WebGL 加载带 Mtl 的 Obj
在 上一篇文章中 中,我们解析了 .obj 文件。 在这篇文章中,让我们解析它的补充文件: .mtl 材质文件。
免责申明 该 .mtl 解析器不会面面俱到或者完美,也不保证能够处理所有 .mtl 文件。 这只是一个练习。如果你使用该程序并遇到问题,下面的链接可能会对你有帮助。
我们加载了我在 Sketchfab 上找到的,由 haytonm 创建的 CC-BY 4.0 椅子。
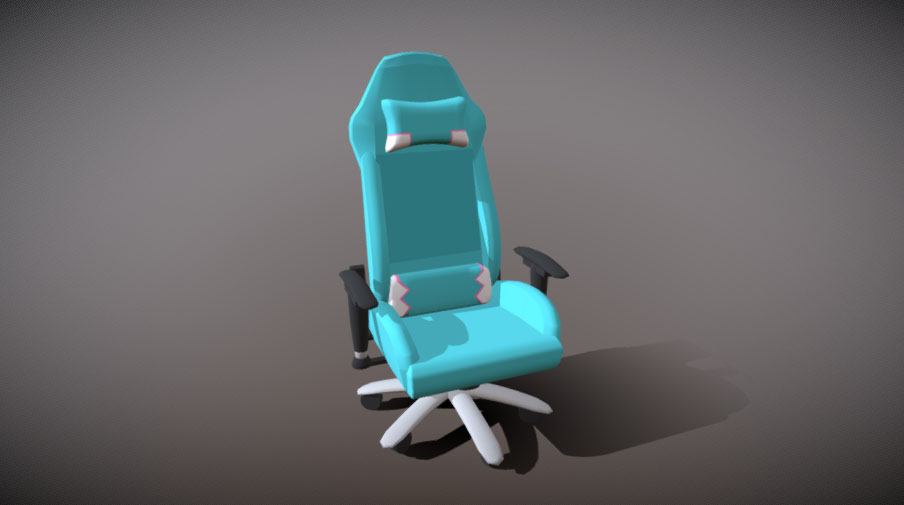
它有一个相应的 .mtl 文件,看起来是这样:
# Blender MTL File: 'None'
# Material Count: 11

newmtl D1blinn1SG
Ns 323.999994
Ka 1.000000 1.000000 1.000000
Kd 0.500000 0.500000 0.500000
Ks 0.500000 0.500000 0.500000
Ke 0.0 0.0 0.0
Ni 1.000000
d 1.000000
illum 2

newmtl D1lambert2SG
Ns 323.999994
Ka 1.000000 1.000000 1.000000
Kd 0.020000 0.020000 0.020000
Ks 0.500000 0.500000 0.500000
Ke 0.0 0.0 0.0
Ni 1.000000
d 1.000000
illum 2

newmtl D1lambert3SG
Ns 323.999994
Ka 1.000000 1.000000 1.000000
Kd 1.000000 1.000000 1.000000
Ks 0.500000 0.500000 0.500000
Ke 0.0 0.0 0.0
Ni 1.000000
d 1.000000
illum 2

... 更多类似的 8 个材质
查看 对 .mtl 文件格式的描述,
我们可以看到以关键词 newmtl 和给定名字开头的新材质,下面是该材质的所有设置。
每行都以关键词开始,这和 .obj 文件类似,所以我们可以用类似的方法来开始解析。
function parseMTL(text) {
  const materials = {};
  let material;

  const keywords = {
    newmtl(parts, unparsedArgs) {
      material = {};
      materials[unparsedArgs] = material;
    },
  };

  const keywordRE = /(\w*)(?: )*(.*)/;
  const lines = text.split('\n');
  for (let lineNo = 0; lineNo < lines.length; ++lineNo) {
    const line = lines[lineNo].trim();
    if (line === '' || line.startsWith('#')) {
      continue;
    }
    const m = keywordRE.exec(line);
    if (!m) {
      continue;
    }
    const [, keyword, unparsedArgs] = m;
    const parts = line.split(/\s+/).slice(1);
    const handler = keywords[keyword];
    if (!handler) {
      console.warn('unhandled keyword:', keyword);
      continue;
    }
    handler(parts, unparsedArgs);
  }

  return materials;
}
接着,我们只需要为每个关键词 添加对应的方法。文档指出:
Ns是 关于点光源的文章 中提到的镜面光泽设置Ka是材质的环境光Kd是散射光,这是在 关于点光源的文章 中的颜色Ks是镜面光Ke是放射光Ni是光学密度。我们这里不使用d代表“溶解”,代表透明度illum指定了材质的光照模型。文档中列出了 11 种类型。我们先忽略它
我在犹豫是否要保持这些名字的原样。我想一个数学人喜欢简短的名字。 但是大多数代码风格指南都喜欢描述性的名字,所以我决定这么做。
function parseMTL(text) {
  const materials = {};
  let material;

  const keywords = {
    newmtl(parts, unparsedArgs) {
      material = {};
      materials[unparsedArgs] = material;
    },
+    Ns(parts)     { material.shininess      = parseFloat(parts[0]); },
+    Ka(parts)     { material.ambient        = parts.map(parseFloat); },
+    Kd(parts)     { material.diffuse        = parts.map(parseFloat); },
+    Ks(parts)     { material.specular       = parts.map(parseFloat); },
+    Ke(parts)     { material.emissive       = parts.map(parseFloat); },
+    Ni(parts)     { material.opticalDensity = parseFloat(parts[0]); },
+    d(parts)      { material.opacity        = parseFloat(parts[0]); },
+    illum(parts)  { material.illum          = parseInt(parts[0]); },
  };

  ...

  return materials;
}
我也在犹豫要不要推测每个 .mtl 文件的路径,或者手动指定。 我们可以这样做:
// 伪代码 - 手动指定 .obj 文件和 .mtl 文件的路径
const obj = downloadAndParseObj(pathToOBJFile);
const materials = downloadAndParseMtl(pathToMTLFile);
或者这样:
// 伪代码 - 根据 .obj 文件推测 .mtl 文件的的路径
const obj = downloadAndParseObj(pathToOBJFile);
const materials = downloadAndParseMtl(pathToOBJFile, obj);
我选择后者,但是我也不确定是好是坏。 根据文档,一个 .obj 文件可以包含多个 .mtl 文件的引用。 我从没见过这样的例子,但我想文档的作者是这么做的。
并且,我也没有见过 .mtl 文件与 .obj 文件命名不同的。
换句话说,如果 .obj 文件是 bananas.obj,那么 .mtl 文件几乎总是 bananas.mtl。
也就是说,规范指出 .mtl 文件是在 .obj 文件中指定的, 所以我决定试着计算 .mtl 文件的路径。
从 上一篇文章 的代码开始, 我们将 .obj 文件的 URL 提取出来,然后构建 .obj 相关的 .mtl 文件的 URL。 最后,我们将它们全部加载,连接起来(因为它们都是文本文件),然后传给解析器。
-const response = await fetch('resources/models/chair/chair.obj');
+const objHref = 'resources/models/chair/chair.obj';
+const response = await fetch(objHref);
const text = await response.text();
const obj = parseOBJ(text);
+const baseHref = new URL(objHref, window.location.href);
+const matTexts = await Promise.all(obj.materialLibs.map(async filename => {
+  const matHref = new URL(filename, baseHref).href;
+  const response = await fetch(matHref);
+  return await response.text();
+}));
+const materials = parseMTL(matTexts.join('\n'));
现在,我们来使用材质。 首先,当我们在设置每个部分的时候,我们需要使用从 .obj 文件中提取出来的材质名称, 然后从刚才加载的材质中查找。
-const parts = obj.geometries.map(({data}) => {
+const parts = obj.geometries.map(({material, data}) => {

  ...

  // create a buffer for each array by calling
  // gl.createBuffer, gl.bindBuffer, gl.bufferData
  const bufferInfo = webglUtils.createBufferInfoFromArrays(gl, data);
  return {
-    material: {
-      u_diffuse: [1, 1, 1, 1],
-    },
+    material: materials[material],
    bufferInfo,
  };
});
当我们在渲染时,我们需要传不止一组全局变量值。
function render(time) {

  ...

  for (const {bufferInfo, material} of parts) {
    // calls gl.bindBuffer, gl.enableVertexAttribArray, gl.vertexAttribPointer
    webglUtils.setBuffersAndAttributes(gl, meshProgramInfo, bufferInfo);
    // calls gl.uniform
    webglUtils.setUniforms(meshProgramInfo, {
      u_world,
-      u_diffuse: material.u_diffuse,
-    });
+    }, material);
    // calls gl.drawArrays or gl.drawElements
    webglUtils.drawBufferInfo(gl, bufferInfo);
  }

  requestAnimationFrame(render);
}
然后我们需要修改着色器。 因为材质有镜面设置,我们添加像 关于点光源的文章 中一样的镜面计算, 除了一点不同,我们计算镜面光是根据方向光源,而不是点光源。
ambient 和 emissive 可能需要解释一下。
ambient 是材质在无方向光源下的反射颜色。
如果我们想看到它,我们可以乘上 u_ambientLight 并设置黑色以外的颜色。这像把东西冲洗干净。
emissive 是材质自身发光的颜色,与所有光照无关,所以我们只要加上它就好。
如果你想有块地方发光,你可能会用到 emissive。
这是新的着色器。
const vs = `
attribute vec4 a_position;
attribute vec3 a_normal;
attribute vec4 a_color;

uniform mat4 u_projection;
uniform mat4 u_view;
uniform mat4 u_world;
+uniform vec3 u_viewWorldPosition;

varying vec3 v_normal;
+varying vec3 v_surfaceToView;
varying vec4 v_color;

void main() {
-  gl_Position = u_projection * u_view * a_position;
+  vec4 worldPostion = u_world * a_position;
+  gl_Position = u_projection * u_view * worldPosition;
+  v_surfaceToView = u_viewWorldPosition - worldPosition.xyz;
  v_normal = mat3(u_world) * a_normal;
  v_color = a_color;
}
`;

const fs = `
precision highp float;

varying vec3 v_normal;
+varying vec3 v_surfaceToView;
varying vec4 v_color;

-uniform vec4 u_diffuse;
+uniform vec3 diffuse;
+uniform vec3 ambient;
+uniform vec3 emissive;
+uniform vec3 specular;
+uniform float shininess;
+uniform float opacity;
uniform vec3 u_lightDirection;
+uniform vec3 u_ambientLight;

void main () {
  vec3 normal = normalize(v_normal);

+  vec3 surfaceToViewDirection = normalize(v_surfaceToView);
+  vec3 halfVector = normalize(u_lightDirection + surfaceToViewDirection);

  float fakeLight = dot(u_lightDirection, normal) * .5 + .5;
+  float specularLight = clamp(dot(normal, halfVector), 0.0, 1.0);

-  vec4 diffuse = u_diffuse * v_color;
+  vec3 effectiveDiffuse = diffuse * v_color.rgb;
+  float effectiveOpacity = opacity * v_color.a;

-  gl_FragColor = vec4(diffuse.rgb * fakeLight, diffuse.a);
+  gl_FragColor = vec4(
+      emissive +
+      ambient * u_ambientLight +
+      effectiveDiffuse * fakeLight +
+      specular * pow(specularLight, shininess),
+      effectiveOpacity);
}
`;
这样,我们得到了和上面图片看起来差不多的效果。
让我们来加载 .mtl 文件中引用纹理的 .obj 文件。
我发现了由 ahedov 创建的的 CC-BY-NC 3.0 风车 3D 模型。
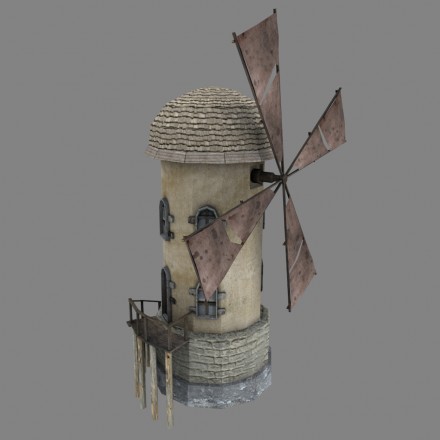
它的 .mtl 文件看起来是这样的:
# Blender MTL File: 'windmill_001.blend'
# Material Count: 2

newmtl Material
Ns 0.000000
Ka 1.000000 1.000000 1.000000
Kd 0.800000 0.800000 0.800000
Ks 0.000000 0.000000 0.000000
Ke 0.000000 0.000000 0.000000
Ni 1.000000
d 1.000000
illum 1
map_Kd windmill_001_lopatky_COL.jpg
map_Bump windmill_001_lopatky_NOR.jpg

newmtl windmill
Ns 0.000000
Ka 1.000000 1.000000 1.000000
Kd 0.800000 0.800000 0.800000
Ks 0.000000 0.000000 0.000000
Ke 0.000000 0.000000 0.000000
Ni 1.000000
d 1.000000
illum 1
map_Kd windmill_001_base_COL.jpg
map_Bump windmill_001_base_NOR.jpg
map_Ns windmill_001_base_SPEC.jpg
我们可以看到 map_Kd,map_Bump 和 map_Ns 都指定了图片文件。
让我们把它们加入到我们的 .mtl 解析器。
function parseMapArgs(unparsedArgs) {
  // TODO: 处理可选项
  return unparsedArgs;
}

function parseMTL(text) {
  const materials = {};
  let material;

  const keywords = {
    newmtl(parts, unparsedArgs) {
      material = {};
      materials[unparsedArgs] = material;
    },
    Ns(parts)       { material.shininess      = parseFloat(parts[0]); },
    Ka(parts)       { material.ambient        = parts.map(parseFloat); },
    Kd(parts)       { material.diffuse        = parts.map(parseFloat); },
    Ks(parts)       { material.specular       = parts.map(parseFloat); },
    Ke(parts)       { material.emissive       = parts.map(parseFloat); },
+    map_Kd(parts, unparsedArgs)   { material.diffuseMap = parseMapArgs(unparsedArgs); },
+    map_Ns(parts, unparsedArgs)   { material.specularMap = parseMapArgs(unparsedArgs); },
+    map_Bump(parts, unparsedArgs) { material.normalMap = parseMapArgs(unparsedArgs); },
    Ni(parts)       { material.opticalDensity = parseFloat(parts[0]); },
    d(parts)        { material.opacity        = parseFloat(parts[0]); },
    illum(parts)    { material.illum          = parseInt(parts[0]); },
  };

  ...
注意:我写了 parseMapArgs,因为根据 这份规范,
还有很多额外的可选项我们没有在这个文件中看到。我们需要重构我的代码才能使用它们。
但现在我们只处理带空格的文件名,不处理可选项。
为了加载所有的纹理,我们会使用来自 关于纹理的文章 的代码,稍作修改。
function create1PixelTexture(gl, pixel) {
  const texture = gl.createTexture();
  gl.bindTexture(gl.TEXTURE_2D, texture);
  gl.texImage2D(gl.TEXTURE_2D, 0, gl.RGBA, 1, 1, 0, gl.RGBA, gl.UNSIGNED_BYTE, new Uint8Array(pixel));
  return texture;
}

function createTexture(gl, url) {
  const texture = create1PixelTexture(gl, [128, 192, 255, 255]);
  // 异步加载图片
  const image = new Image();
  image.src = url;
  image.addEventListener('load', function () {
    // 图片加载完成后复制到纹理
    gl.bindTexture(gl.TEXTURE_2D, texture);
    gl.pixelStorei(gl.UNPACK_FLIP_Y_WEBGL, true);
    gl.texImage2D(gl.TEXTURE_2D, 0, gl.RGBA, gl.RGBA, gl.UNSIGNED_BYTE, image);

    // 检查图片在每个维度都为 2 的幂
    if (isPowerOf2(image.width) && isPowerOf2(image.height)) {
      // Yes, it's a power of 2. Generate mips.
      gl.generateMipmap(gl.TEXTURE_2D);
    } else {
      // No, it's not a power of 2. Turn of mips and set wrapping to clamp to edge
      gl.texParameteri(gl.TEXTURE_2D, gl.TEXTURE_WRAP_S, gl.CLAMP_TO_EDGE);
      gl.texParameteri(gl.TEXTURE_2D, gl.TEXTURE_WRAP_T, gl.CLAMP_TO_EDGE);
      gl.texParameteri(gl.TEXTURE_2D, gl.TEXTURE_MIN_FILTER, gl.LINEAR);
    }
  });
  return texture;
}
两个材质可能引用同一张图片,所以我们将所有的纹理根据名字保存在对象中,这样就不用加载两次了。
const textures = {};

// 为材质加载纹理
for (const material of Object.values(materials)) {
  Object.entries(material)
    .filter(([key]) => key.endsWith('Map'))
    .forEach(([key, filename]) => {
      let texture = textures[filename];
      if (!texture) {
        const textureHref = new URL(filename, baseHref).href;
        texture = createTexture(gl, textureHref);
        textures[filename] = texture;
      }
      material[key] = texture;
    });
}
上面的代码遍历了每个材质的每个属性。
如果属性以 "Map" 结尾,就创建相对 URL,创建纹理,然后分配回材质。
我们将异步的加载图片到纹理中。
我们也会放一个单独的白像素纹理,给那些没有引用纹理的材质。 这样我们就可以使用同一个着色器了。 否则,我们需要不同的着色器,一个处理带纹理的材质,一个处理不带纹理的。
-const textures = {};
+const textures = {
+  defaultWhite: create1PixelTexture(gl, [255, 255, 255, 255]),
+};
我们也给材质的其它参数设置默认值:
+const defaultMaterial = {
+  diffuse: [1, 1, 1],
+  diffuseMap: textures.defaultWhite,
+  ambient: [0, 0, 0],
+  specular: [1, 1, 1],
+  shininess: 400,
+  opacity: 1,
+};

const parts = obj.geometries.map(({material, data}) => {

  ...

  // create a buffer for each array by calling
  // gl.createBuffer, gl.bindBuffer, gl.bufferData
  const bufferInfo = webglUtils.createBufferInfoFromArrays(gl, data);
  return {
-    material: materials[material],
+    material: {
+      ...defaultMaterial,
+      ...materials[material],
+    },
    bufferInfo,
  };
});
要使用纹理,我们要修改着色器。我们一个一个来处理。我们先来使用漫反射贴图。
const vs = `
attribute vec4 a_position;
attribute vec3 a_normal;
+attribute vec2 a_texcoord;
attribute vec4 a_color;

uniform mat4 u_projection;
uniform mat4 u_view;
uniform mat4 u_world;
uniform vec3 u_viewWorldPosition;

varying vec3 v_normal;
varying vec3 v_surfaceToView;
+varying vec2 v_texcoord;
varying vec4 v_color;

void main() {
  vec4 worldPosition = u_world * a_position;
  gl_Position = u_projection * u_view * worldPosition;
  v_surfaceToView = u_viewWorldPosition - worldPosition.xyz;
  v_normal = mat3(u_world) * a_normal;
+  v_texcoord = a_texcoord;
  v_color = a_color;
}
`;

const fs = `#version 300 es
precision highp float;

varying vec3 v_normal;
varying vec3 v_surfaceToView;
+varying vec2 v_texcoord;
varying vec4 v_color;

uniform vec3 diffuse;
+uniform sampler2D diffuseMap;
uniform vec3 ambient;
uniform vec3 emissive;
uniform vec3 specular;
uniform float shininess;
uniform float opacity;
uniform vec3 u_lightDirection;
uniform vec3 u_ambientLight;

void main () {
  vec3 normal = normalize(v_normal);

  vec3 surfaceToViewDirection = normalize(v_surfaceToView);
  vec3 halfVector = normalize(u_lightDirection + surfaceToViewDirection);

  float fakeLight = dot(u_lightDirection, normal) * .5 + .5;
  float specularLight = clamp(dot(normal, halfVector), 0.0, 1.0);

-  vec3 effectiveDiffuse = diffuse.rgb * v_color.rgb;
-  float effectiveOpacity = v_color.a * opacity;
+  vec4 diffuseMapColor = texture2D(diffuseMap, v_texcoord);
+  vec3 effectiveDiffuse = diffuse * diffuseMapColor.rgb * v_color.rgb;
+  float effectiveOpacity = opacity * diffuseMapColor.a * v_color.a;

  gl_FragColor = vec4(
      emissive +
      ambient * u_ambientLight +
      effectiveDiffuse * fakeLight +
      specular * pow(specularLight, shininess),
      effectiveOpacity);
}
`;
我们有纹理啦!
回头看 .mtl 文件,我们看到 map_Ks 基本是黑白的纹理,它指定了特定表面的光泽度,
或者也可以说是多少镜面反射的效果。
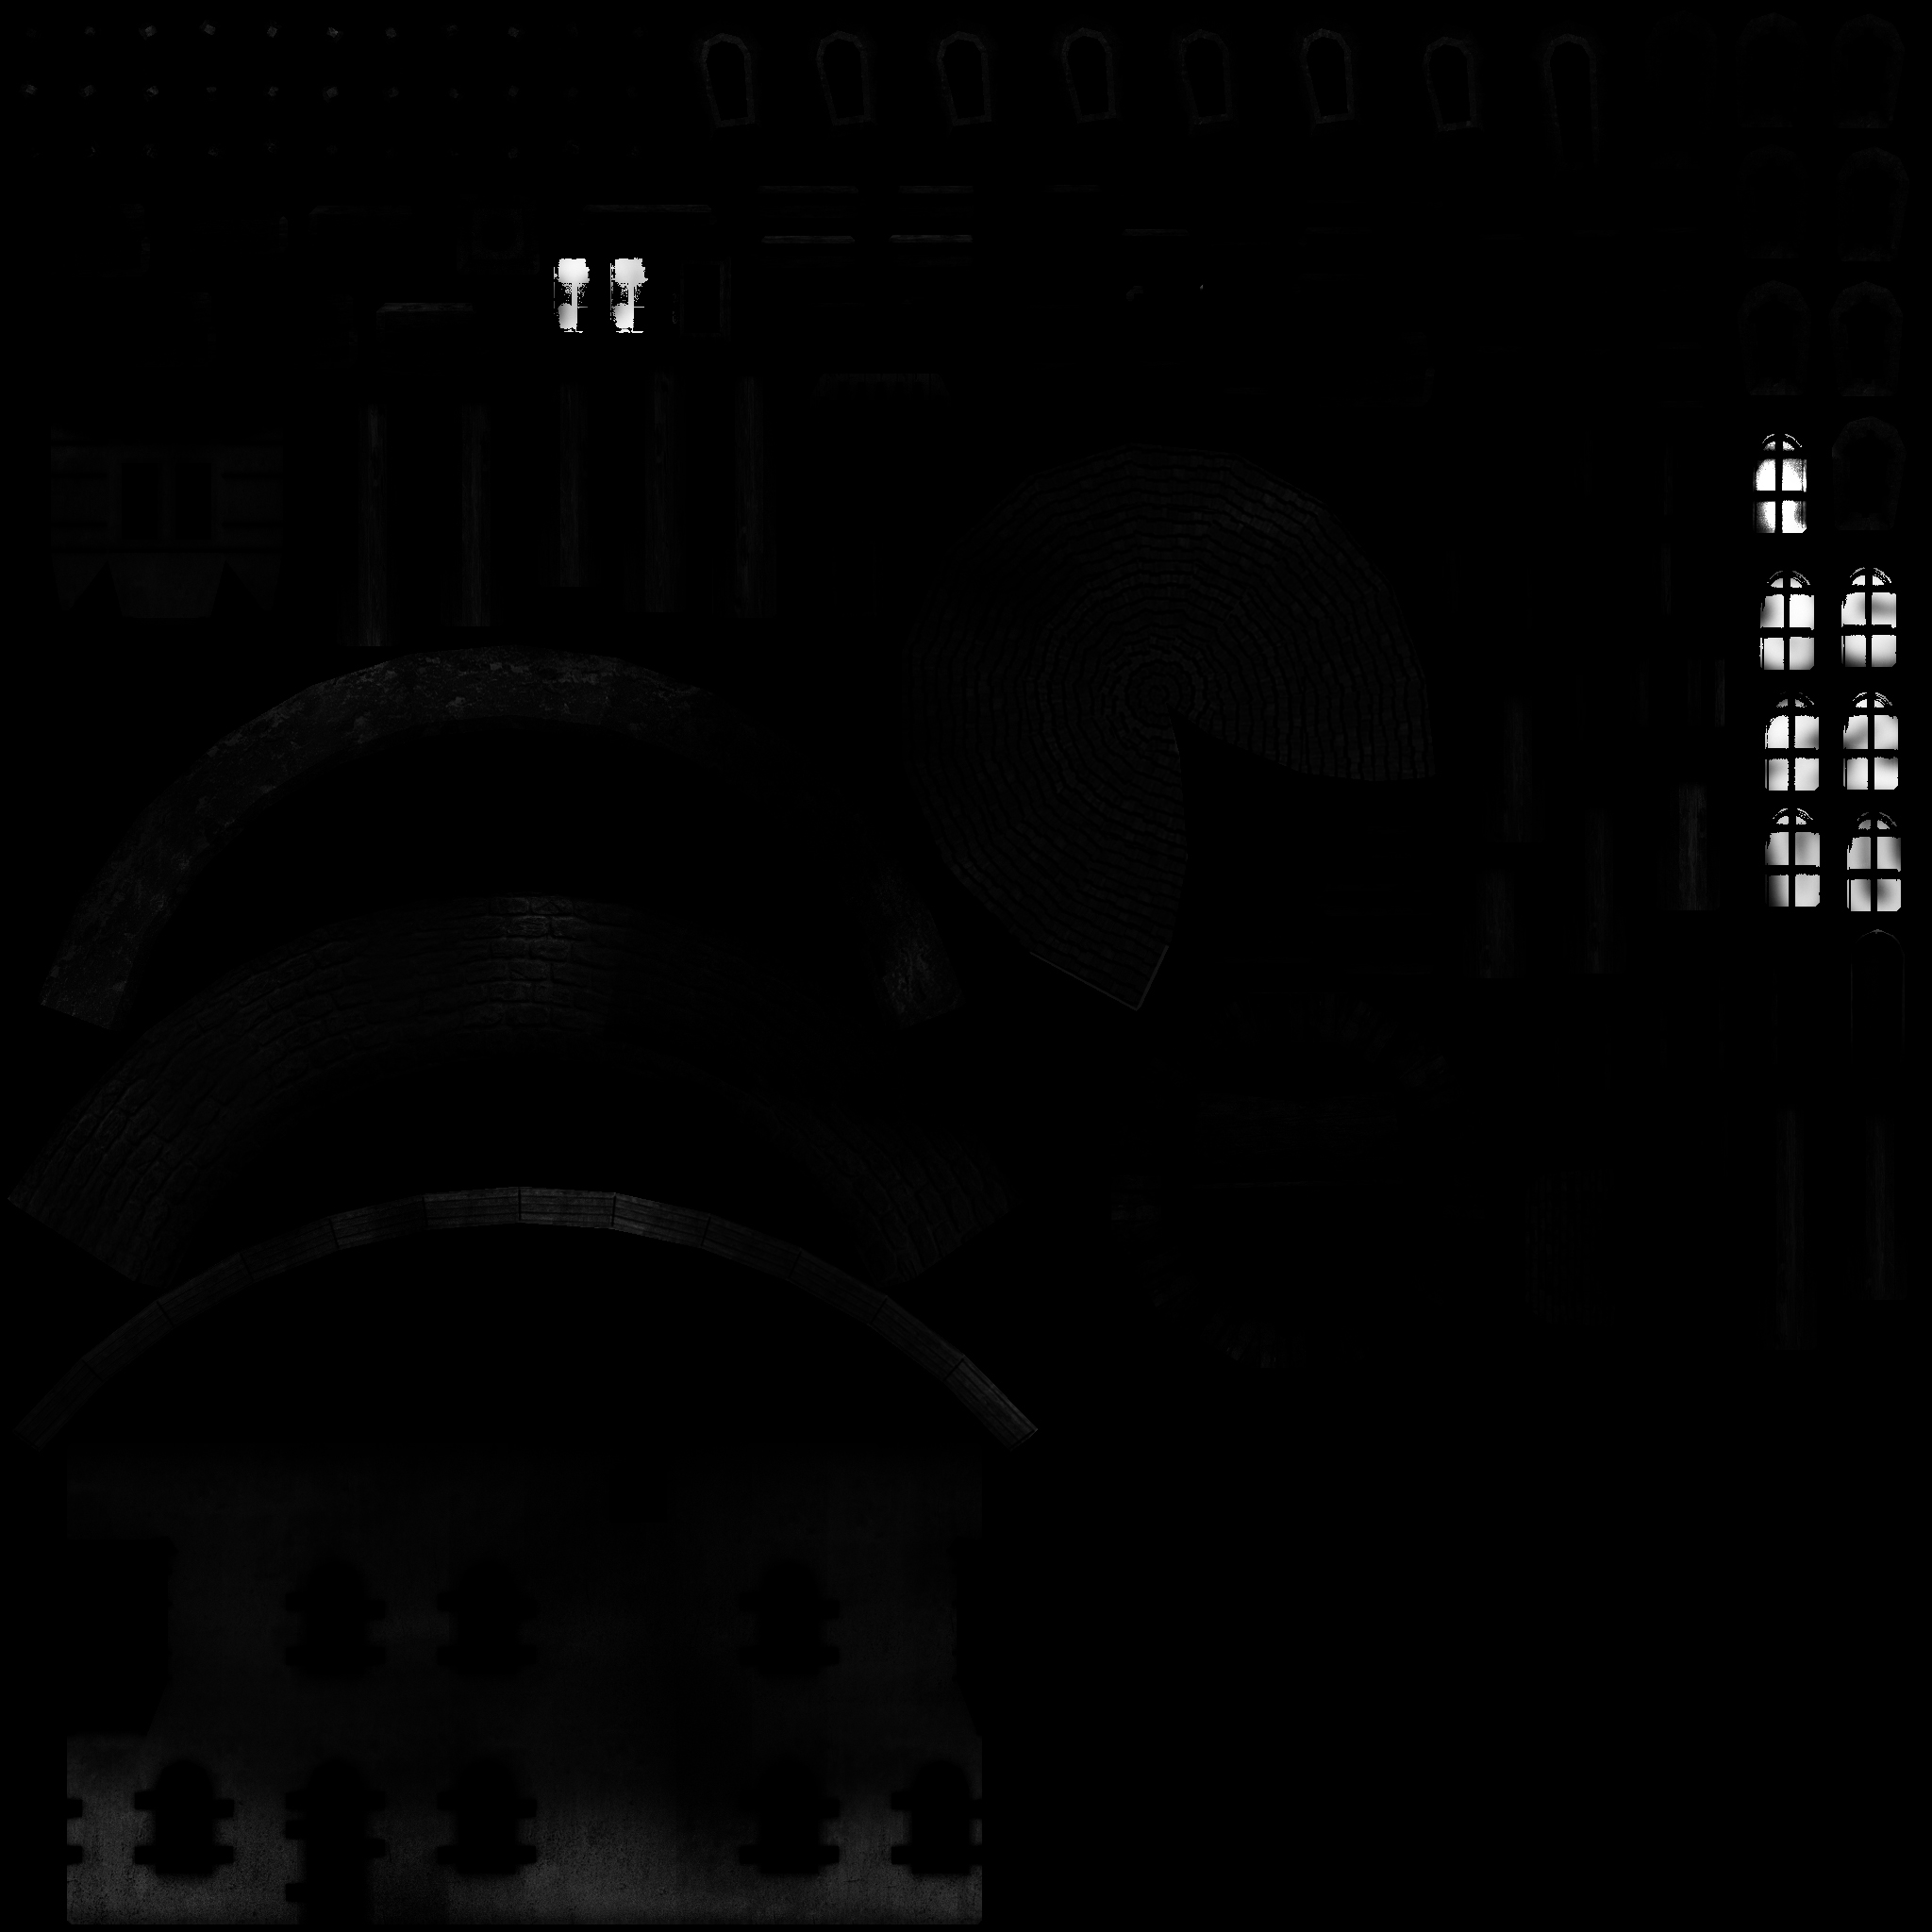
为了使用它,只需要更新着色器,因为我们已经加载了全部的纹理。
const fs = `
precision highp float;

varying vec3 v_normal;
varying vec3 v_surfaceToView;
varying vec2 v_texcoord;
varying vec4 v_color;

uniform vec3 diffuse;
uniform sampler2D diffuseMap;
uniform vec3 ambient;
uniform vec3 emissive;
uniform vec3 specular;
+uniform sampler2D specularMap;
uniform float shininess;
uniform float opacity;
uniform vec3 u_lightDirection;
uniform vec3 u_ambientLight;

void main () {
  vec3 normal = normalize(v_normal);

  vec3 surfaceToViewDirection = normalize(v_surfaceToView);
  vec3 halfVector = normalize(u_lightDirection + surfaceToViewDirection);

  float fakeLight = dot(u_lightDirection, normal) * .5 + .5;
  float specularLight = clamp(dot(normal, halfVector), 0.0, 1.0);
+  vec4 specularMapColor = texture2D(specularMap, v_texcoord);
+  vec3 effectiveSpecular = specular * specularMapColor.rgb;

  vec4 diffuseMapColor = texture2D(diffuseMap, v_texcoord);
  vec3 effectiveDiffuse = diffuse * diffuseMapColor.rgb * v_color.rgb;
  float effectiveOpacity = opacity * diffuseMapColor.a * v_color.a;

  gl_FragColor = vec4(
      emissive +
      ambient * u_ambientLight +
      effectiveDiffuse * fakeLight +
-      specular * pow(specularLight, shininess),
+      effectiveSpecular * pow(specularLight, shininess),
      effectiveOpacity);
}
`;
我们也给没有高光贴图的材质设置默认值:
const defaultMaterial = {
  diffuse: [1, 1, 1],
  diffuseMap: textures.defaultWhite,
  ambient: [0, 0, 0],
  specular: [1, 1, 1],
+  specularMap: textures.defaultWhite,
  shininess: 400,
  opacity: 1,
};
根据 .mtl 文件中的材质设置,很难看到什么效果。 让我们来修改下镜面设置,这样就好了
// hack the materials so we can see the specular map
Object.values(materials).forEach((m) => {
  m.shininess = 25;
  m.specular = [3, 2, 1];
});
这样,只有窗和叶片被设置成反射高光了。
我很奇怪叶片被设置成了反光。
如果你检查 .mtl 文件,你会发现光泽度 Ns 被设置成了 0.0,也就是几乎不反光。
但同时,所有材质的 illum 被设置成了 1。根据文档,照度模型为 1 意味着:
颜色 = KaIa + Kd { SUM j=1...ls, (N * Lj)Ij }
更通俗的说:
颜色 = 环境色 * 环境光 + 漫反射色 * 光照计算和
你可以看到并没有用到镜面反射,但文件里却有镜面贴图!¯_(ツ)_/¯ 镜面高光需要照度模型为 2 或以上。 这是我的一些关于 .obj/.mtl 文件的经验,你总是需要对材质做一些手动调整。 如何解决这些问题取决于你。你可以编辑 .mtl 文件,或者添加代码。 而我们现在会添加一些代码。
最后一个 .mtl 文件使用贴图的是凹凸贴图: map_Bump。
这又是一个可以看出 .obj/.mtl 文件古老的地方。
引用的只是法线贴图,并不是凹凸贴图。
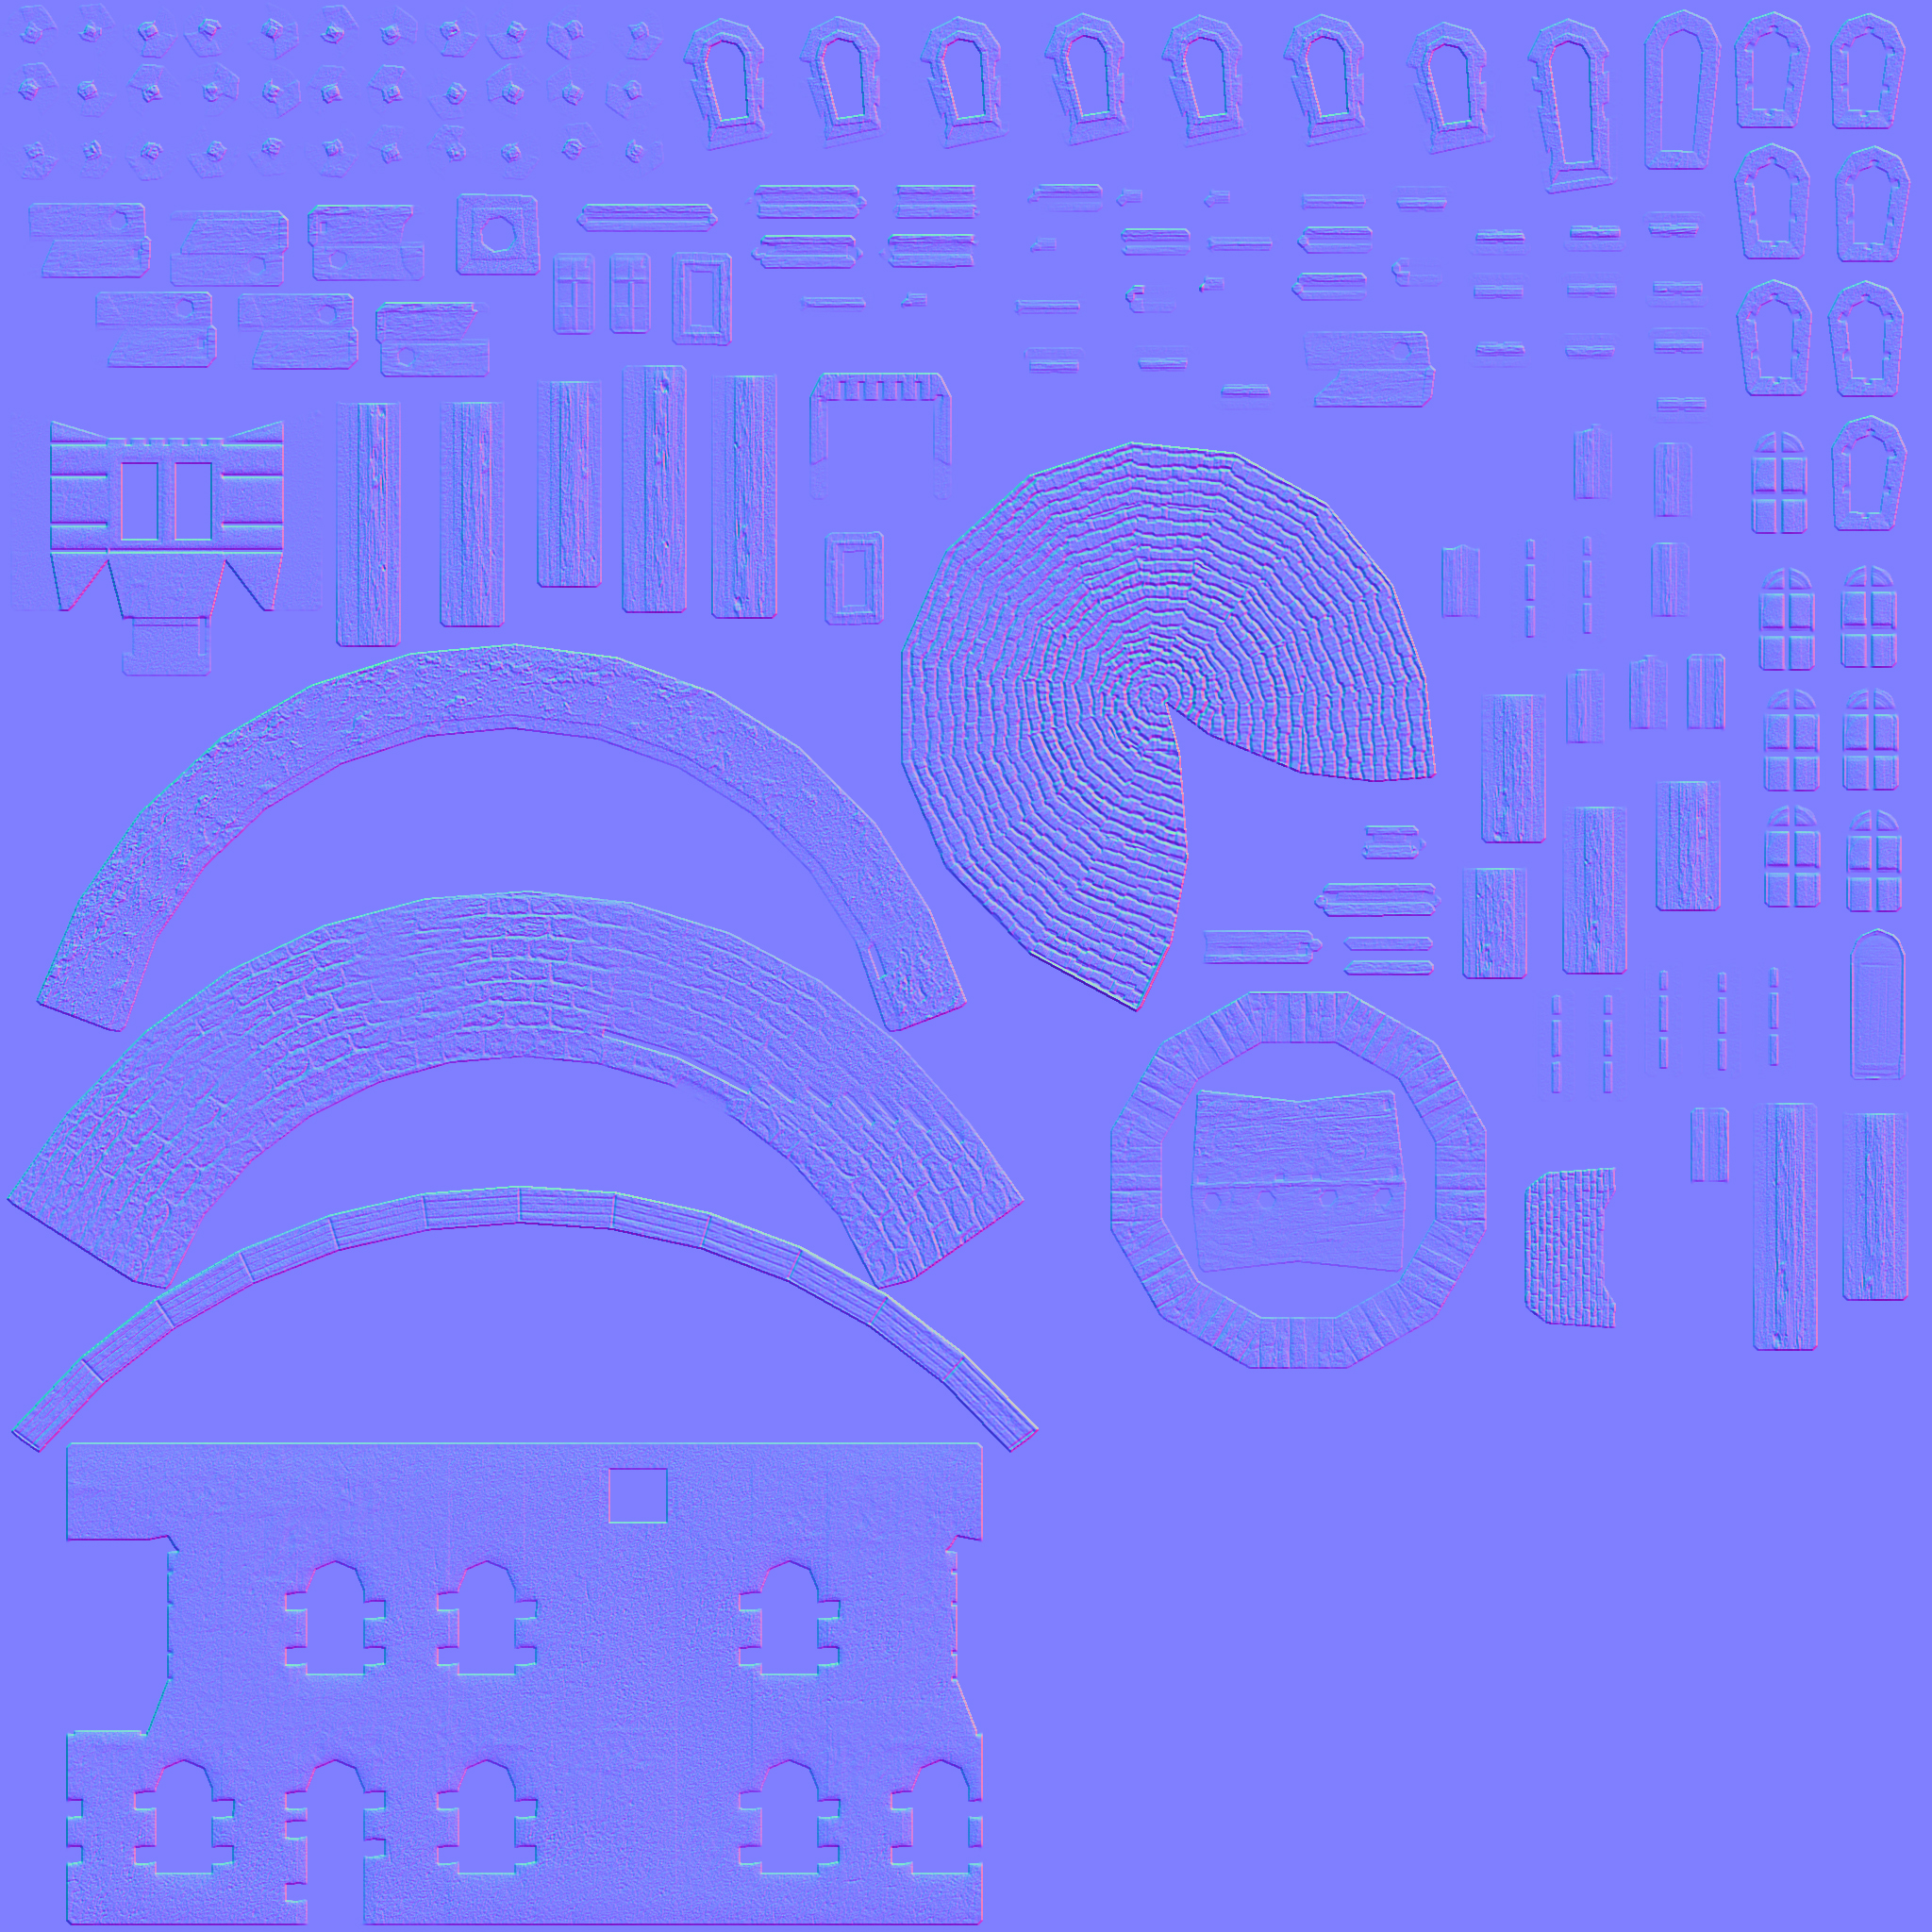
.mtl 文件中并没有选项指定将凹凸贴图用作法线贴图。
我们可以启发性的假设文件名中有个 'nor' 呢?
或者我们可以假设 2020 及以后,所有 map_Bump 引用的文件都是法线贴图,
因为我不确定在过去的几年中看到过 .obj 文件中引用的确实是凹凸贴图。
我们先沿着这个假设做把。
我们会用到来自 关于法线贴图的文章 的代码来生成切线。
const parts = obj.geometries.map(({material, data}) => {
  ...

+  // 如果数据满足,生成切线
+  if (data.texcoord && data.normal) {
+    data.tangent = generateTangents(data.position, data.texcoord);
+  } else {
+    // 没有切线
+    data.tangent = { value: [1, 0, 0] };
+  }

  // create a buffer for each array by calling
  // gl.createBuffer, gl.bindBuffer, gl.bufferData
  const bufferInfo = twgl.createBufferInfoFromArrays(gl, data);
  const vao = twgl.createVAOFromBufferInfo(gl, meshProgramInfo, bufferInfo);
  return {
    material: {
      ...defaultMaterial,
      ...materials[material],
    },
    bufferInfo,
    vao,
  };
});
同样的,为没有法线贴图的材质添加默认值:
const textures = {
  defaultWhite: create1PixelTexture(gl, [255, 255, 255, 255]),
+  defaultNormal: create1PixelTexture(gl, [127, 127, 255, 0]),
};

...

const defaultMaterial = {
  diffuse: [1, 1, 1],
  diffuseMap: textures.defaultWhite,
+  normalMap: textures.defaultNormal,
  ambient: [0, 0, 0],
  specular: [1, 1, 1],
  specularMap: textures.defaultWhite,
  shininess: 400,
  opacity: 1,
};
...
然后我们需要将 关于法线贴图的文章 中对着色器的修改合并:
const vs = `
attribute vec4 a_position;
attribute vec3 a_normal;
+attribute vec3 a_tangent;
attribute vec2 a_texcoord;
attribute vec4 a_color;

uniform mat4 u_projection;
uniform mat4 u_view;
uniform mat4 u_world;
uniform vec3 u_viewWorldPosition;

varying vec3 v_normal;
+varying vec3 v_tangent;
varying vec3 v_surfaceToView;
varying vec2 v_texcoord;
varying vec4 v_color;

void main() {
  vec4 worldPosition = u_world * a_position;
  gl_Position = u_projection * u_view * worldPosition;
  v_surfaceToView = u_viewWorldPosition - worldPosition.xyz;

-  v_normal = mat3(u_world) * a_normal;
+  mat3 normalMat = mat3(u_world);
+  v_normal = normalize(normalMat * a_normal);
+  v_tangent = normalize(normalMat * a_tangent);

  v_texcoord = a_texcoord;
  v_color = a_color;
}
`;

const fs = `
precision highp float;

varying vec3 v_normal;
+varying vec3 v_tangent;
varying vec3 v_surfaceToView;
varying vec2 v_texcoord;
varying vec4 v_color;

uniform vec3 diffuse;
uniform sampler2D diffuseMap;
uniform vec3 ambient;
uniform vec3 emissive;
uniform vec3 specular;
uniform sampler2D specularMap;
uniform float shininess;
uniform sampler2D normalMap;
uniform float opacity;
uniform vec3 u_lightDirection;
uniform vec3 u_ambientLight;

void main () {
  vec3 normal = normalize(v_normal);
+  vec3 tangent = normalize(v_tangent);
+  vec3 bitangent = normalize(cross(normal, tangent));
+
+  mat3 tbn = mat3(tangent, bitangent, normal);
+  normal = texture2D(normalMap, v_texcoord).rgb * 2. - 1.;
+  normal = normalize(tbn * normal);

  vec3 surfaceToViewDirection = normalize(v_surfaceToView);
  vec3 halfVector = normalize(u_lightDirection + surfaceToViewDirection);

  float fakeLight = dot(u_lightDirection, normal) * .5 + .5;
  float specularLight = clamp(dot(normal, halfVector), 0.0, 1.0);
  vec4 specularMapColor = texture2D(specularMap, v_texcoord);
  vec3 effectiveSpecular = specular * specularMapColor.rgb;

  vec4 diffuseMapColor = texture2D(diffuseMap, v_texcoord);
  vec3 effectiveDiffuse = diffuse * diffuseMapColor.rgb * v_color.rgb;
  float effectiveOpacity = opacity * diffuseMapColor.a * v_color.a;

  gl_FragColor = vec4(
      emissive +
      ambient * u_ambientLight +
      effectiveDiffuse * fakeLight +
      effectiveSpecular * pow(specularLight, shininess),
      effectiveOpacity);// * 0.0 + vec4(normal * 0.5 + 0.5 + effectiveSpecular * pow(specularLight, shininess), 1);
}
`;
这样,我们就得到了法线贴图。注意:我移近了摄像头,这样能看的更清楚。
我确信我们还可以支持更多的 .mtl 文件的的特性。
比如 refl 关键词指定了反射贴图,也就是 环境贴图。
同样还有很多 map_ 加各种选项参数的关键词。比如:
-clamp on | off指定纹理是否重复-mm base gain指定纹理值的偏移和倍数-o u v w指定纹理座标的偏移。可以像 关于 drawImage 的文章 中那样放进纹理矩阵中来使用-s u v w指定纹理座标的缩放。像上面一样,这些需要放进纹理矩阵中
我不知道有多少 .mtl 文件使用了这些设置,或用了多少。
例如,要支持 -o 和 -s,我们就要假设所有的贴图都有区别,并支持全部的纹理。
这就需要我们为每个纹理传不同的纹理矩阵,
而这又需要我们从顶点着色器为每个纹理传不同的纹理座标到片段着色器,
或者在片段着色器中进行纹理矩阵乘法(而不是传统方法那样在顶点着色器中做)。
更重要的是,如果支持所有特性,会让着色器变得又大又复杂。
上面的代码是一种 超级着色器 的样子,一个试图处理所有情况的着色器。
通过传默认值来让它正常工作。
例如,我们将 diffuseMap 默认设置成白色纹理,这样如果我们加载了没有纹理的模型,也可以显示出来。
漫反射的颜色会被乘上白色,也就是 1.0,所以我们就能得到漫反射颜色。
类似的,我们将顶点颜色默认设置为白色。
这是一种常用的方式。如果它效果不错,满足了你的要求,就没有理由去改动它。
更常见的做法是生成一个可以开/关这些特性的着色器。
如果没有顶点颜色,就通过操作字符串,生成一个着色器,着色器里没有 a_color 属性和其它相关代码。
类似的,如果一个材质没有漫反射贴图,就生成一个没有 uniform sampler2D diffuseMap 的着色器,并移除相关代码。
如果不包含任何贴图,就不需要纹理座标,我们就可以把它们全部移除。
如果将这些组合都加上,可能会有 1000 多种着色器。 我们上面有的特性就有:
- 漫反射贴图 有/无
- 镜面贴图 有/无
- 法线贴图 有/无
- 顶点颜色 有/无
- 环境贴图 有/无 (我们不支持,但 .mtl 文件中有)
- 反射贴图 有/无 (我们不支持,但 .mtl 文件中有)
仅这些就有 64 种组合。如果再加上 1 到 4 种光线(点光源、方向光源等),那么就会有 8192 种可能的着色器组合。
管理这些就会有很多工作。这就是为什么很多人选择像 three.js 这样的 3D 引擎而不是自己开发的原因。 但至少这篇文章介绍了一些展示任意 3D 内容的相关的知识。